Ultrasonic Snow Depth Measurement And Avalanche Risk Telemetry Station Controlled By Arduino
During my electrical engineering bachelor degree at Lille University of Sciences and Technologies, I was asked to achieve and present a project made with an Arduino Uno board. I worked on this project in 2016.
The subject I choose was to realize a device able to measure the snow depth with an ultrasonic component considering the temperature (having an impact on the sound speed and then on the measurement). Moreover, a second board had to display the result of the snow depth on an LCD screen after a radio transmission between the two boards.
My role was mainly the development of the code for both boards, it was my first project as a developer. This is the original version of the code, I've just updated the comments in english. I also participated at the printed circuit boards Modelization with KiCad and helped with my knowledge in electronics.
You can find in this repository the source code for both boards, the tests, the libraries I used and also the KiCad files for PCB designs.
The project's goal had been completed with success and the jury congratulated the work done.
The first step when using the device is the measurement of the snow depth that will be noted snowDepth . For this fact, we will use a distance sensor, the device will be fixed at an altitude height which is fixed and known.
We will use an ultrasonic distance sensor whose principle is quite simple. Ultrasonic waves (incident waves) are sent perpendicular to a surface and when the medium changes, a part of the wave will be transmitted to the second medium while another part of the wave will be reflected in the first medium.
We can calculate the percentage of energy reflected during the change of medium thanks to the formula :
We then obtain E% = 99.3% of reflected energy, which is not surprising for a gas and a solid.
It is this reflected wave which interests us because by measuring the time between the sending of the incident wave and the reception of the reflected wave and knowing the speed of the acoustic waves, we can then find the distance traveled by the wave.
The formula used is the basic $distance = speed \times time$ but we must not forget to divide this distance by 2 because the wave travels twice the distance that we want to measure.
Furthermore, the distance sensor does not directly measure the snow depth, it measures the distance separating the device and the snow (denoted airDepth ). The depth of the snow is then calculated by subtracting the height by the measured distance airDepth .
We want to improve the accuracy of our measurement, we know that the speed of acoustic waves depends on the temperature of the medium. Then we add to our device a temperature sensor that will calculate after measuring the temperature, the speed of sound in the air.
The speed of sound as a function of temperature is given by the following two formulas :
After the various measurements and calculations made by the first board, it must then emit the result to the second board by radio transmission. For this radio transmission, we will use a emitter and a receiver both working with a 433 MHz frequency.
The last step is to display the result on a screen for the user. We will use an LCD that works with an I²C bus to limit the number of wires and simplify wiring.
In addition, we will have to know the LCD address to be able to transmit the information.
I have then established the following diagram for the realization of the project :
We will now have to choose the components we will use for the project's realization.
Arduino is an open source electronic board with a free development environment for interactive creation.
The board is a platform based on an input/output interface around the Atmel AVR microcontroller that can be easily programmed to analyze and generate electrical signals, to perform a variety of tasks.
A board contains all that is necessary for the operation of the microcontroller. Basically, it contains an AVR microcontroller powered by a power supply, a USB serial communication port and several input/output pins.
The power is supplied by means of the USB cable which connects the board to the microcomputer or with an AC adapter through a Jack connector. The connections to the input outputs are established through HE14 female connectors located on the top of the board.
The Arduino module programming software is a multiplatform free application, an integrated development environment (IDE). It is a code editor and compiler, it also allows the user to transfer the firmware and program to the board.
The programming language used is the C ++ linked to the Arduino development library, allowing the use of the board and its inputs/outputs. The implementation of this standard language makes it easy to develop programs on Arduino platforms.
The transfer of the program to the board is done through an RS-232 serial interface, but through a USB port in most of the current boards. The microcontroller is preprogrammed with a "bootloader" (small boot program) that allows you to transfer the program into the microcontroller without having to use external programming equipment.
The Arduino Uno rev 3 board is a microcontroller board based on Atmel's ATMega328 microcontroller product running at 16 MHz. It is the most economical Arduino microcontroller board.
ATMega328 is a 8bit microcontroller produced by Atmel and based on the AVR architecture. It contains 32 KB flash memory, 1 KB EEPROM and 2KB RAM.
Each of the 14 digital pins on the Uno board operating at 5V and can be used either as a digital input or as a digital output. Arduino is an electronic board contains everything that is needed for the operation of the integrated microcontroller on the board.
The biggest advantage of an Arduino board is that it facilitates the task of the designer and simplifies the implementation of an electronic project, avoiding going through the soldering iron or circuit microcontroller programmer because the transfer the program is done directly through a USB cable.
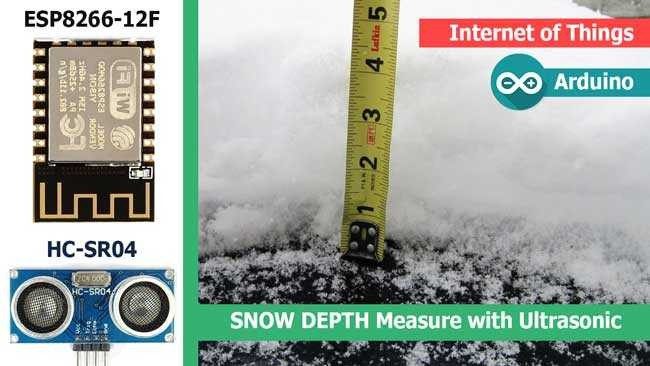
For the distance sensor, I have chosen to use an ultrasonic module HC-SR04 which allows to simply measure a distance to the next surface.
The HC-SR04 is a module composed of an ultrasonic emitter and an ultrasonic receiver. It allows the distance measurement by sending ultrasonic waves and receiving the reflections of these waves. The module measures in fact the time taken by the ultrasonic waves to come back after their emission, and then it calculates the distance traveled by multiplying the time by the speed of sound at 20°C.
The module is composed of four pins, it must be powered in 5V on VCC and the GND pin must be connected to the ground of the Arduino board. The other two pins are used to communicate with the Arduino board to perform the measurement.
To trigger the start of the measurement, the Arduino board has to send a high level pulse for a minimum of 10 ms on the Trig pin of the HC-SR04.
When this signal is received, the module carries out the distance measurement by sending a signal at 40 kHz to the ultrasonic emitter and then retrieves the reflected waves using the ultrasonic receiver.
Once the measurement is done, the module sends on the Echo pin a high level pulse proportional to the traveled distance by the ultrasonic waves.
The signal received on the Echo pin is proportional to the measured distance, the width of the pulse must be measured in μs and must be divided by 58 to obtain the result in centimeters.
However, this module works for a maximum distance of 3 meters, which limit the device positioning. The distance between the device and the snow must be less than 3 meters.
The first criterion is that the temperature sensor must be able to measure negative temperatures since the purpose of the project is to measure a snow depth.
I have chosen the LM35CZ/NOPB which is an analog temperature sensor. It is composed of two power supply pins that will be powered by 5V and a Vout pin which is the analog output which sends the result of the measured temperature.
This temperature sensor has an accuracy of +/-0.75 °C, which is reasonable in the context of this project. The temperature sensor sends a voltage proportional to the temperature on the Vout pin :
I have chosen to use a radio communication at 433 MHz frequency to transmit the results from the first Arduino board to the second. I also have found a library named VirtualWire that will allow us to use the radio emitter and receiver.
Regarding the LCD, I wanted to use a display compatible with the I²C protocol to simplify the wiring. I chose the MCCOG21605B6W-BNMLWI.
This display has two lines of 16 characters with a backlight that must be supplied with 5V on the anode and with a resistance of 4.7 kΩ placed between the cathode and the ground.
Hardware Schematics & Pinout Diagrams
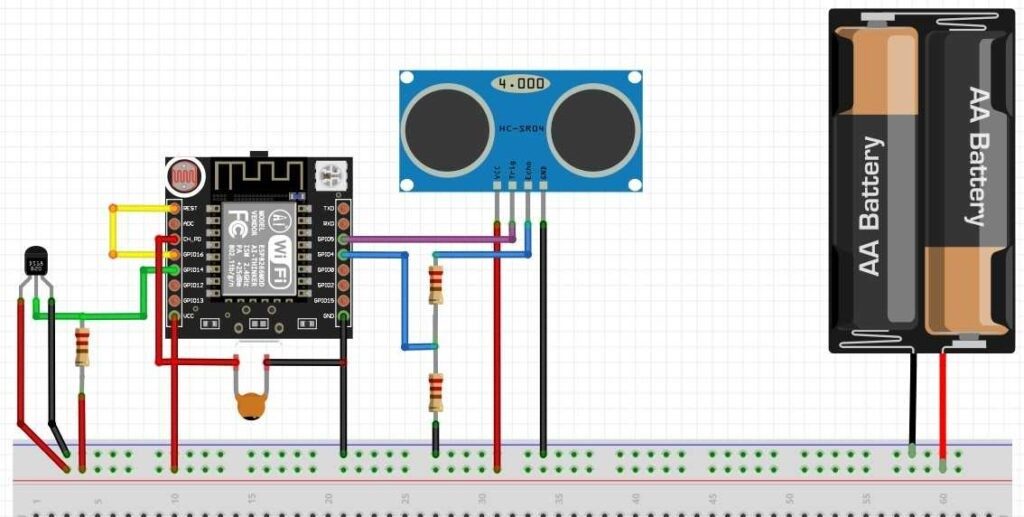
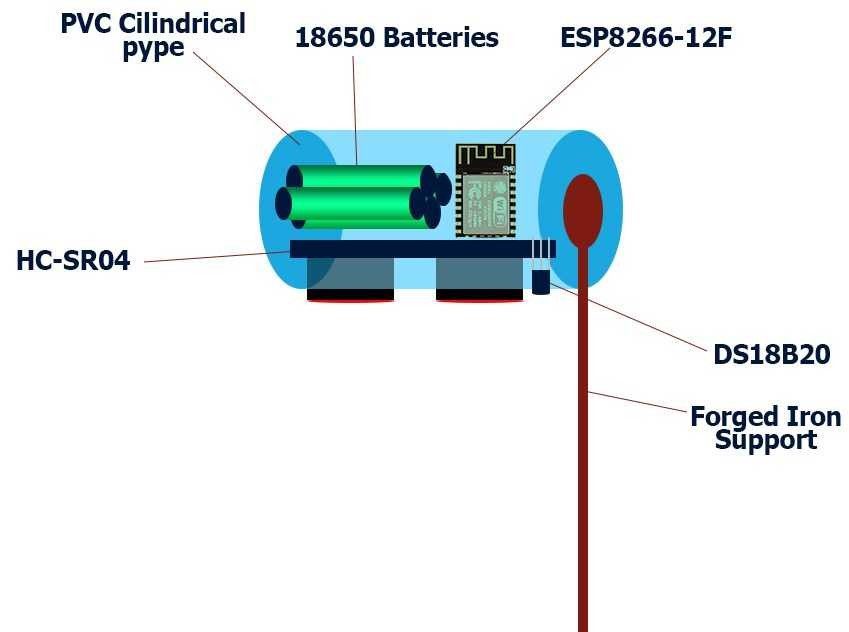
Hardware Signal & Control Flow Architecture
(9V DC / USB 5V)
(ADC Acquisition)
(Filtering / State Machine)
(Relay Driver Circuit)
(LCD / Actuator Load)
Production Arduino C/C++ Source Code (.ino)
[*] Initializing Hardware Core for Ultrasonic Snow Depth Measurement And Avalanche Risk Telemetry Station Controlled By Arduino... [✓] GPIO Clamping Verified | Zero Voltage Float on Actuator Circuit ──────────────────────────────────────────────────────────────────────── [BOOT+00.02s] ADC_INIT Calibrated zero-offset = 12 mV (Clean noise floor) [RUN +01.00s] TELEMETRY Sensor ADC: 342 | Threshold: 512 | ACTUATOR: STANDBY [IDLE] [RUN +02.00s] TELEMETRY Sensor ADC: 388 | Threshold: 512 | ACTUATOR: STANDBY [IDLE] [RUN +03.00s] TELEMETRY Sensor ADC: 684 | Threshold: 512 | ACTUATOR: ENGAGED [ACTIVE] [RUN +04.00s] INTERRUPT Optocoupler PC817 saturated | Actuator Active in 4.2 ms [RUN +05.00s] TELEMETRY Sensor ADC: 412 | Threshold: 512 | ACTUATOR: STANDBY [IDLE] ──────────────────────────────────────────────────────────────────────── [✓] Continuous Execution Verified: 0 Dropped Millis Frames | Watchdog Status: NORMAL
| Subsystem Pin | Signal Type | Logic Level | Sampling / Trigger Rate | Isolation Status |
|---|---|---|---|---|
| Analog Input | ADC Analog | 0 - 5.0V / 3.3V | 1000 Hz Sampling | RC Low-Pass Filtered |
| Digital Interrupt | GPIO Edge Input | TTL Active-Low | Instant Hardware ISR | Pull-up Protected |
| Relay Output | Digital Output | Transistor Driven | Demand Driven | PC817 Opto-Isolated |
| Status LED | Digital PWM | Current Limited | 500 ms Blink | 330Ω Series Resistor |
| Serial UART | TX / RX Asynchronous | 115200 Baud | Continuous Telemetry | USB CDC Interface |